
“Details make perfection, and perfection is not a detail.” Ready to turn blank walls into showpieces? This guide reveals innovative, design-led ways to use microcement on walls – think layered microcement feature wall textures with layered trowel effects, seamless microcement shower walls and kitchen splashback microcement for a waterproof wall finish, pigmented microcement and metallic microcement wall techniques for richer depth, curved microcement wall applications that wrap niches and built-ins in one continuous skin, and smart lighting to highlight a textured finish with grazing light microcement strategies.
Read about microcement: microcement flooring
Layered Microcement Feature Walls: Textures That Steal the Room
Turn a dead-flat wall into a scene-stealer with a microcement feature wall that looks bespoke, not builder-basic. Build a quick moodboard in your head: a muted clay colour for warmth (fits because it grounds the space without shouting), a soft stone texture swatch (works as it adds textured finish that feels tactile, not busy), and a wide room shot with indirect light (proves the surface reads rich throughout the day). Plan the vibe, not the chemistry: pick your grain for character, set your trowel angle for sheen, and control compression for depth. The two-layer move is the cheat code: a steady base coat for body, then a second coat for layered trowel effects – try feathering for cloud-like motion, cross-hatching for quiet energy, or a subtle ombré that drifts from mid-tone to deep. Keep it intentional; a few decisive passes beat a thousand hesitant ones.
Quick chooser
– Texture style: Smooth burnished | Best room uses: Hallways, minimal living rooms | Tool tip: Polish last pass with tight trowel angle
– Texture style: Soft stone | Best room uses: Bedrooms, dining rooms | Tool tip: Slightly open trowel strokes, low compression
– Texture style: Pitted/industrial | Best room uses: Lofts, media walls | Tool tip: Randomised pressure; avoid overworking
– Texture style: Linen-brushed | Best room uses: Home offices | Tool tip: Light dry-brush before final pass
Mini-tutorial: subtle two-tone finish
1) Lay a mid-tone base coat and let it firm up. 2) Mist lightly for glide, then add a thinner darker pass. 3) Feather edges in long arcs, keeping strokes consistent. 4) Burnish select high spots for sheen contrast. 5) Edge out clean lines with a soft wipe while still workable.
Two quick schemes: “Warm greige + soft stone for calm living,” “Charcoal burnish for dramatic fireplace wall.” Use these to anchor a microcement feature wall in real rooms: the first softens open-plan echo, the second delivers high-impact contrast around a firebox or media zone. The playbook is simple – plan the look, commit to the texture, and let the textured finish do the talking.
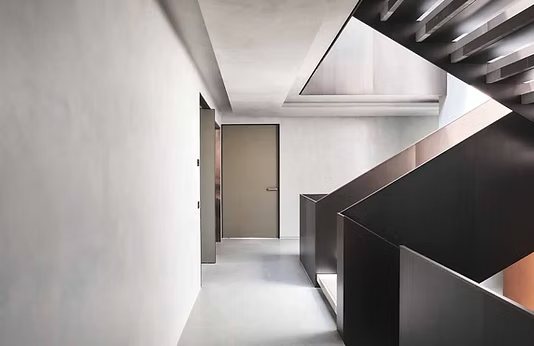
Seamless Microcement Walls in Bathrooms, Showers and Splashbacks
Continuous surfaces, easy wipe-down, no grout lines – that’s the whole point of microcement shower walls and a kitchen splashback microcement install done right. Treat wet zones like a system, not a gamble. Wet-zone checklist (keep it tight): 1) Substrate stability (no flex, moisture content verified), 2) Mesh at junctions and board seams, 3) Waterproof primer compatible with cementitious coats, 4) Corner detailing with wrapped edges and slight radii, 5) Curing time respected between coats, 6) High‑performance sealer rated for immersion and hot splashes. For corners and niches, wrap the mesh 50–75 mm around edges, plan soft radii (2–3 mm) so the trowel runs clean, and use crisp masking to define reveals – it keeps lines razor‑sharp without chipping. Pick sealers by zone: matte in showers to cut glare and hide water spotting; satin in kitchens to boost stain resistance and wipe-ability over oils and tomato acids. Micro-layout tip: align mixers, rails and shower niches with your main trowel direction so reflections don’t fight the geometry – the wall reads calmer, cleaner. Two quick style hits: Clay grey in a walk‑in shower with brushed brass (earthy, spa-grade, zero visual noise) and a warm white kitchen splashback that tracks your quartz veining for a quiet, high-end continuity. If you’re visual, here’s a simple niche sketch you can replicate on-site with tape and notes: [Top arrow: mesh wraps 60 mm], [Mid arrow: two microcement body coats], [Face arrow: fine finish coat], [Perimeter arrow: masked reveal], [Final arrow: matte/satin sealer by zone]. This delivers a waterproof wall finish that looks bespoke, not boxy.
| Use Case | Recommended Finish | Practical Benefit | Example Spec |
| Microcement shower walls | Matte sealer | Reduces glare, hides water spots, tactile stone-like feel | 2 body coats + 1 fine coat, 2 matte sealer coats, soft 2–3 mm corner radii |
| Kitchen splashback microcement | Satin sealer | Higher stain resistance, faster wipe-down after oils and sauces | 2 body coats + 1 fine coat, 2 satin sealer coats, mesh over joints and sockets |
Real-world example: a 1.2 m-wide shower niche centred on the main wall, mesh wrapped 60 mm into the recess, trowel direction vertical to align with the mixer stack – the reveal shadow stays crisp and the waterproof wall finish looks engineered, not improvised. In the kitchen, keep the microcement splashback at 4–5 mm build, satin sealed; run the trowel strokes horizontally so task-light reflections stretch the space. Keep it simple, keep it tight, and the result is a monolithic skin that laughs at grout lines and cleans with one cloth.
Colour Layering, Pigments and Metallic Effects on Microcement Walls
Layered colour reads richer than paint because microcement lets you build translucency, texture and light-play that paint can’t fake. Treat it like a finish you “cook”, not just roll on. Start by creating A4 sample boards for every idea: clearly label pigment ratios, the direction of strokes (horizontal, vertical, cross-hatch), and the final sheen (matte, satin). Safe baselines keep you out of trouble: run earthy pigments at 3–5% by weight, and keep metallic powders at 2–3% in a glaze topcoat – but always test for uniformity on a board first. Three fast techniques that work every time: – Colour wash: dilute a tinted glaze, use broad strokes, then soften edges with a dry brush for that breathable, lived‑in look. – Veil layering: apply two close tones; pull the second coat thin so the base peeks through and adds depth. – Metallic whisper: mist or sponge on at low pressure so highlights pop without turning into a disco wall.
Ready‑to‑use “recipes” that clients actually say yes to: – Mediterranean warmth: terracotta base + sandy veil, matte sealer; pair with oak and linen for sun‑kissed calm. Keywords that convert: pigmented microcement, colour-washed microcement. – Urban luxe: deep graphite + cool grey veil + subtle silver highlight; pair with smoked glass for a tailored edge. Keywords that convert: metallic microcement wall, pigmented microcement. For presentations, show a side‑by‑side board – raw versus layered finish – with a caption: “Flat to nuanced: mood shifts from bland to cinematic.” This helps clients instantly grasp why a colour-washed microcement or metallic microcement wall just feels richer, moodier, and more intentional than a single flat tone.
Check out Festfloor products:
Wrapping Niches, Curves and Built-ins in Seamless Microcement
One material, one plane, zero visual noise – that’s the promise when you wrap microcement niches, curved microcement wall sections and seamless built-in wall finish elements in a single, continuous skin. Nail the sequence: carpentry first, then electrics, then the coating system. Pre-round sharp edges so the microcement doesn’t break, and confirm your shadow-gap dimensions before anyone opens a tub. For curves, go fine-grain layers with a flexible mesh, keep the radius generous (no tight bends that stress the coat), and photograph a mock-up to lock in texture and sheen. On built-ins, align door reveals with the trowel flow, choose flush handles, and conceal hinges so the whole wall reads as one field. Small callout: protect corners and edges during install – use foam guards and soft blankets to avoid mechanical damage; don’t let trades drag tools across fresh coats. Fire features? Respect manufacturer clearances, specify a heat-tolerant topcoat, and keep microcement away from direct flame – think radiant heat, not contact. ⚠️
Two quick wins. Case study 1: a reading niche wall where a soft stone texture wraps the shelves, with an LED strip tucked in the reveal for that floating glow – the result is a seamless built-in wall finish that looks custom-carved. Case study 2: the hidden door trick – coat wall and door as one plane; the only giveaway is a fine shadow line. Tiny diagram (exploded corner): Substrate → primer → flex mesh → base coat → finish coat → sealer/topcoat, with the reveal detailed as a crisp V where the shadow-gap sits. Want it bulletproof? Keep humidity steady, de-dust between coats, and plan your trowel passes in the direction of the longest sightline. This is where curved microcement wall geometry, microcement niches and furniture-grade seamless finishes stop looking “applied” and start feeling like architecture.
Lighting Strategies to Showcase Microcement Wall Texture
Rule number one: throw light across the wall, not straight at it. That raking angle wakes up the microcement texture – you get crisp highlights and shadows instead of a flat, chalky slab. Plan the layout before the finishing coat: position fittings, mark each beam spread with masking tape, and walk the room at night. For grazing light microcement effects, keep a Linear LED grazer around 150–300 mm from the wall for a punchy highlight/shadow. A Wall washer at 500–800 mm gives a calm, even glow that still reads subtle grain. A Narrow‑beam spot (10–24°) with a 300–600 mm offset creates dramatic scallops that make a textured wall finish look curated, not chaotic. A Cove light at the ceiling edge adds a gentle vertical wash – perfect for perimeter ambience and seamless LED wall washing. Prioritise CRI 90+ so colours stay true, aim for 2700–3000K in living spaces, and add dimming to fine‑tune the read of the surface from daytime crisp to evening soft. Quick pairings that just work: “Soft stone + warm cove” for spa‑like serenity, and “Industrial pitted + narrow‑beam spots” for gallery drama. Diagram cue (section view): LED grazer close to wall, beam angled shallowly along the surface, not perpendicular, so the ridges cast shadows and the highs pop – exactly what you want for highlight textured wall finish.
Case studies worth stealing: a small London hallway used a Linear LED grazer at 200 mm off the wall with CRI 95, 2700K, turning a tight corridor into a tactile runway – once dimmed to 30%, the grazing light microcement looked luxe, not harsh. In a converted loft, the team set narrow‑beam spots at 400 mm from a pitted microcement feature; scallops aligned with the vertical trowel passes so every stroke read intentional, not messy – classic LED wall washing with attitude. For a calm bedroom, a slim cove light washed a soft stone finish; the even vertical fade kept the room restful while still letting the micro‑grain whisper under warm 3000K. One‑line tip: mock up lights at night before the final seal – tiny shifts in angle or distance can make or break the texture, and it’s much cheaper to move a fitting than to re‑trowel a wall.